When working on tile installation, one of the most common questions that arises is: What direction do you notch a trowel? At first, it may seem like a minor detail, but the way you use your notched trowel can make a significant difference in how well the tiles bond to the adhesive beneath them. Getting this technique right ensures even coverage, prevents hollow spots, and contributes to a long-lasting, professional-looking finish.
Understanding the Role of a Notched Trowel
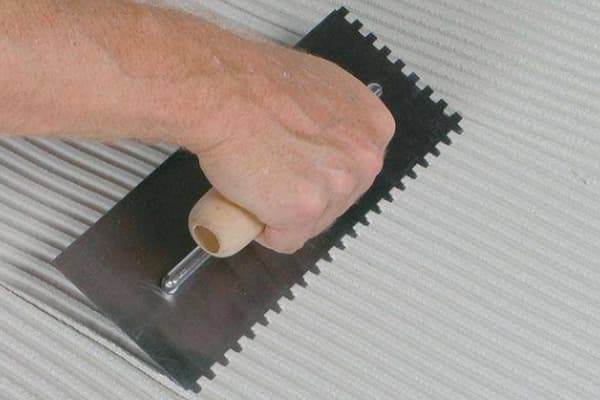
A notched trowel is a specialized tool used for spreading thinset, mortar, or adhesive evenly before laying tile, stone, or other flooring materials. The trowel’s notches—usually shaped like a square, U, or V—create ridges in the adhesive layer. These ridges serve an important purpose: when a tile is pressed down, the ridges collapse and spread the adhesive uniformly across the back of the tile.
If the adhesive is applied incorrectly, it can leave air pockets, leading to weak adhesion, loose tiles, or future cracking. That’s why the direction in which you notch the trowel matters.
The Correct Direction to Notch a Trowel
The general rule of thumb is that you should notch your trowel in straight, parallel lines, not in circles or random patterns. The direction of the lines should be consistent across the surface. This ensures that when the tile is pressed into place, the adhesive ridges collapse properly and distribute evenly.
But which way should those lines go?
-
For Square or Rectangular Tiles
The notches should be combed in one direction, and ideally aligned parallel to the shortest side of the tile. For example, if you are laying a 12″ x 24″ tile, the notches should run parallel to the 12″ side. This makes it easier for the mortar to spread when pressure is applied. -
For Large-Format Tiles
Large tiles (anything over 15 inches on one side) require extra care. Notching in a straight, uniform direction helps achieve better coverage, but professionals often also use a technique called back-buttering—spreading a thin layer of adhesive on the back of the tile before placing it. With the trowel lines all running the same way, when you press the tile down, the ridges collapse efficiently, leaving no gaps. -
Avoid Circular Motions
Many beginners mistakenly notch the adhesive in circular or swirling patterns. While it might look like it would create good coverage, in reality, it traps air pockets and prevents the adhesive from spreading evenly. Straight, consistent ridges are always the better choice.
Why Direction Matters
The direction of your notches affects how the adhesive flows beneath the tile. When all ridges run in the same direction, air can escape easily as you press the tile into place. If ridges are crossed or curved, air gets trapped, which leads to voids. These voids can cause:
-
Weak adhesion
-
Loose or rocking tiles
-
Cracks under pressure
-
Uneven surfaces
For areas exposed to moisture—like showers or outdoor patios—improper coverage can also allow water to seep in, causing long-term damage.
Tips for Best Results
-
Hold the Trowel at the Right Angle
Typically, a 45-degree angle works best. This helps create ridges of the right height without flattening the adhesive too much. -
Choose the Right Notch Size
Smaller tiles usually require smaller notches (like a 1/4-inch V-notch), while larger tiles need deeper notches (like a 1/2-inch square notch). The correct size ensures enough adhesive coverage. -
Check for Coverage
Periodically lift a tile after setting it to see if the adhesive is spreading correctly. Ideally, you want at least 80–95% coverage, depending on the application. -
Work in Manageable Sections
Spread adhesive only in areas you can tile within 10–15 minutes. If the mortar dries too quickly, it won’t bond properly.
Conclusion
So, what direction do you notch a trowel? The answer is clear: always notch in straight, parallel lines—never in circles or random patterns. For rectangular tiles, run the notches parallel to the shortest side of the tile to encourage the best adhesive spread. By following this method, you’ll reduce the risk of air pockets, ensure proper adhesion, and achieve a professional-quality tile installation that lasts for years.
Post time: Aug-19-2025