Choosing the right notched trowel is essential for a successful tile installation project. The size of the notched trowel you need depends on several factors, including the type and size of the tile, the surface you’re tiling onto, and the type of adhesive being used. Picking the wrong size could result in poor adhesion, uneven tiles, or even tile failure over time. In this article, we’ll break down the basics of notched trowels and help you determine the right one for your project.
What Is a Notched Trowel?
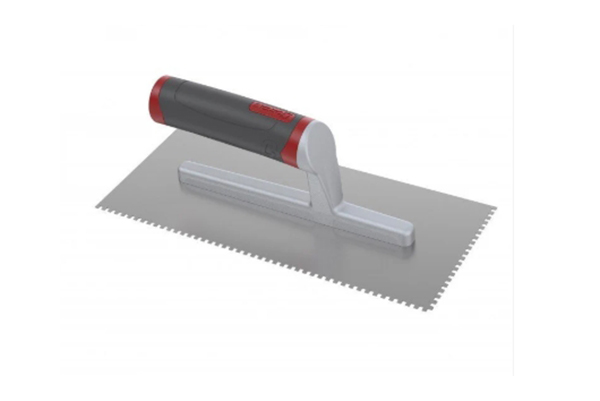
A notched trowel is a flat metal tool with a handle, featuring evenly spaced notches along one or more edges. These notches leave grooves in the adhesive (usually thinset mortar) to help spread it evenly and create full coverage behind tiles. Notched trowels come in two main styles:
-
Square-Notch Trowel: Produces square grooves; common for floor tile installation.
-
V-Notch or U-Notch Trowel: Produces V- or U-shaped grooves; usually used for smaller wall tiles or mosaics.
Why Trowel Size Matters
When you press a tile into the adhesive, the grooves made by the notches collapse to create a solid bond. If the notches are too small, you might not get enough coverage. If they’re too big, you could have too much mortar, which can ooze out and make a mess.
The Tile Council of North America (TCNA) recommends that at least 80% coverage be achieved for wall tiles in dry areas and 95–100% coverage for floor tiles or tiles in wet areas like showers. The right trowel ensures you get that coverage without waste or complications.
Choosing a Trowel Based on Tile Size
Here’s a general guide to selecting a notched trowel based on tile size:
-
Mosaic Tiles (1″ to 4″)
Use a V-notch trowel, usually 3/16″ x 5/32″ or 1/4″ x 3/16″. These allow for precise placement without too much mortar buildup behind small tiles. -
Small Tiles (4″ x 4″ to 6″ x 6″)
A 1/4″ x 1/4″ square-notch trowel is often ideal. It gives adequate coverage for small wall or floor tiles without excessive mortar. -
Medium Tiles (8″ x 8″ to 12″ x 12″)
Use a 1/4″ x 3/8″ square-notch trowel. These are some of the most commonly used trowels for floor tile installations in homes. -
Large Format Tiles (15″ and larger)
Use a 1/2″ x 1/2″ square-notch or even a 3/4″ x 3/4″ U-notch trowel. Large tiles require more adhesive for proper bonding, especially if the tile or substrate is uneven.
Additional Considerations
1. Tile Backing and Flatness
Some tiles have textured or ribbed backings, which require deeper mortar grooves for full contact. Similarly, if your subfloor or wall is uneven, a larger trowel can help accommodate irregularities.
2. Type of Adhesive
Some modified thinsets flow better and need less buildup. Always check the adhesive manufacturer’s recommendations, as they may suggest a particular trowel size for optimal performance.
3. Tile Orientation
For large rectangular tiles, setting them with a slight back-and-forth motion (or back buttering them) in combination with the correct trowel ensures better coverage and adhesion.
Final Tips
-
Test coverage: After setting a tile, lift it up to check how much of the back is covered. If you’re getting less than 80–95% coverage, switch to a larger trowel.
-
Keep it consistent: Always maintain the same trowel angle (typically 45 degrees) while spreading mortar to ensure uniform application.
-
Clean as you go: Clean up excess mortar quickly before it hardens.
Conclusion
Choosing the right notched trowel is key to a successful tile job. Whether you’re working with small mosaics or large format tiles, matching the trowel size to the tile dimensions and the installation surface ensures strong adhesion, better coverage, and a professional finish. When in doubt, check the tile and adhesive manufacturer’s guidelines—and don’t be afraid to test a few tiles before committing to the entire surface.
Post time: Jul-24-2025